SpringBoot整合rpc-netty-framework
一个分布式微服务RPC框架 | 返回
使用效果:
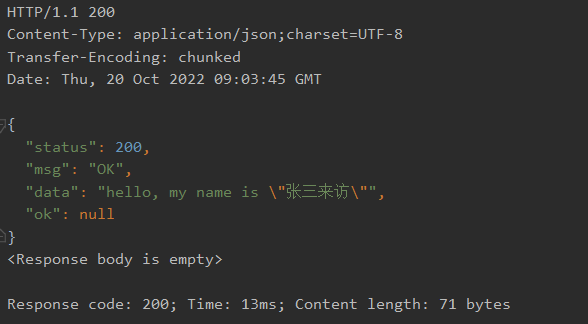
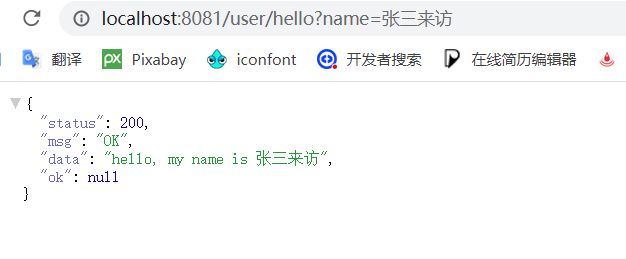
- 用户访问客户端:GET http://localhost:8081/user/hello?name="张三来访"
- 浏览器访问客户端:
服务端接收情况:

服务端负载注册服务:

上面的实现就好比客户端只拿到服务端的api接口,加上配置中心地址即可调用远程服务!
1. 创建工程
创建两个工程,一个作为服务端SpringBoot、一个作为客户端SpringBoot,同时作为后端接口服务
创建Maven工程的时候推荐使用父子工程依赖,而且要注意子模块之间的相互依赖关系,其中:
父模块(root项目):负责管理SpringBoot版本、统一版本、JDK版本、日志依赖
1
2
3
4
5
6
7
8
9
10
11
12
13
14
15
16
17
18
19
20
21
22
23
24
25
26
27
28
29
30
31
32
33
34
35
| <profiles>
<profile>
<id>jdk1.8</id>
<activation>
<activeByDefault>true</activeByDefault>
<jdk>1.8</jdk>
</activation>
<properties>
<maven-compiler-source>1.8</maven-compiler-source>
<maven-compiler-target>1.8</maven-compiler-target>
<maven-copiler-compilerVersion>1.8</maven-copiler-compilerVersion>
</properties>
</profile>
</profiles>
<parent>
<groupId>org.springframework.boot</groupId>
<artifactId>spring-boot-starter-parent</artifactId>
<version>2.1.2.RELEASE</version>
<relativePath/>
</parent>
<dependencies>
<dependency>
<groupId>org.projectlombok</groupId>
<artifactId>lombok</artifactId>
<version>1.18.10</version>
</dependency>
<dependency>
<groupId>ch.qos.logback</groupId>
<artifactId>logback-classic</artifactId>
<version>1.2.3</version>
</dependency>
</dependencies>
|
主模块(启动类所在模块)应配置maven打包插件,SpringBootStarterWeb,rpc-core和依赖Service/Controller模块,客户端只有Service模块,服务端只有Controller模块
1
2
3
4
5
6
7
8
9
10
11
12
13
14
15
16
17
18
19
20
21
22
23
24
25
26
27
28
| <dependencies>
<dependency>
<groupId>cn.fyupeng</groupId>
<artifactId>springboot-rpc-service</artifactId>
<version>1.0-SNAPSHOT</version>
</dependency>
<dependency>
<groupId>cn.fyupeng</groupId>
<artifactId>rpc-core</artifactId>
<version>2.0.0</version>
</dependency>
<dependency>
<groupId>org.springframework.boot</groupId>
<artifactId>spring-boot-starter-web</artifactId>
</dependency>
</dependencies>
<build>
<plugins>
<plugin>
<groupId>org.springframework.boot</groupId>
<artifactId>spring-boot-maven-plugin</artifactId>
</plugin>
</plugins>
</build>
|
Service/Controller模块:依赖api模块和common模块,客户端请求服务端调用服务,当然没有Service模块,让主模块依赖Controller模块,Controller模块还要与主模块一样依赖SpringBootStarterWeb和rpc-core
1
2
3
4
5
6
7
8
9
10
11
12
| <dependencies>
<dependency>
<groupId>cn.fyupeng</groupId>
<artifactId>springboot-rpc-common</artifactId>
<version>1.0-SNAPSHOT</version>
</dependency>
<dependency>
<groupId>cn.fyupeng</groupId>
<artifactId>springboot-rpc-api</artifactId>
<version>1.0-SNAPSHOT</version>
</dependency>
</dependencies>
|
Common模块,依赖rpc-common模块
1
2
3
4
5
6
7
| <dependencies>
<dependency>
<groupId>cn.fyupeng</groupId>
<artifactId>rpc-common</artifactId>
<version>2.0.0</version>
</dependency>
</dependencies>
|
项目在准备测试服务端的自动发现服务功能时,要保证cn.fyupeng.@Service注解类能够被扫描,使用cn.fyupeng.util.ReflectUtil类即可。
1
2
3
4
5
6
7
8
| public class Test {
public static void main(String[] args) throws IOException {
Set<Class<?>> classes = ReflectUtil.getClasses("cn.fyupeng");
for (Class<?> aClass : classes) {
System.out.println(aClass);
}
}
}
|
2. 客户端
2.1 编写启动器
新建cn.fyupeng包,包下新建启动器类
1
2
3
4
5
6
7
| @SpringBootApplication
@ComponentScan(basePackages = {"cn.fyupeng","org.utils"})
public class SpringBootClientStarter {
public static void main(String[] args) {
SpringApplication.run(SpringBootClientStarter.class, args);
}
}
|
2.2 编写配置文件
1
2
3
4
5
6
|
cn.fyupeng.nacos.register-addr=192.168.10.1:8848
cn.fyupeng.nacos.cluster.use=true
cn.fyupeng.nacos.cluster.load-balancer=round
cn.fyupeng.nacos.cluster.nodes=192.168.10.1:8847|192.168.10.1:8848;192.168.10.1:8849
|
2.3 编写自定义配置类
2.4 编写api
注意与客户端包名完全相同
1
2
3
4
5
6
7
8
9
10
11
12
| package cn.fyupeng.service;
public interface HelloService {
String sayHello(String name);
}
|
2.5 编写控制器
@PostConstruct注解不要与@Autowire公用,因为@Autowire是本地依赖的,而我@PostConstruct会在该变量使用前调用,不过需要自行去实现,我的实现是远程依赖。
而@Reference没有依赖注入的功能,只有在超时重试才需要标记上!
@PostContruct与@Autowire在51cto博客中有所讲解,请自行到我的github主页get
1
2
3
4
5
6
7
8
9
10
11
12
13
14
15
16
17
18
19
20
21
22
23
24
25
26
27
28
29
30
31
32
33
34
35
36
37
38
39
40
41
42
43
44
45
46
47
48
49
50
51
52
| package cn.fyupeng.controller;
import cn.fyupeng.anotion.Reference;
import cn.fyupeng.loadbalancer.RandomLoadBalancer;
import cn.fyupeng.net.netty.client.NettyClient;
import cn.fyupeng.proxy.RpcClientProxy;
import cn.fyupeng.serializer.CommonSerializer;
import cn.fyupeng.service.HelloService;
import org.springframework.beans.factory.annotation.Autowired;
import org.springframework.web.bind.annotation.GetMapping;
import org.springframework.web.bind.annotation.RequestMapping;
import org.springframework.web.bind.annotation.RestController;
import org.utils.JSONResult;
import javax.annotation.PostConstruct;
@RequestMapping("/user")
@RestController
public class HelloController {
private static final RandomLoadBalancer randomLoadBalancer = new RandomLoadBalancer();
private static final NettyClient nettyClient = new NettyClient(randomLoadBalancer, CommonSerializer.KRYO_SERIALIZER);
private static final RpcClientProxy rpcClientProxy = new RpcClientProxy(nettyClient);
@Reference(retries = 5, timeout = 600, asyncTime = 3000)
private HelloService helloService;
@PostConstruct
public void init() {
helloService = rpcClientProxy.getProxy(HelloService.class, HelloController.class);
}
@GetMapping("/hello")
public JSONResult sayHello(String name) {
return JSONResult.ok(helloService.sayHello(name));
}
}
|
3. 服务端
3.1 编写配置类
新建cn.fyupeng.config包,在包下新建资源配置类,用于注入绑定端口
1
2
3
4
5
6
7
8
9
10
11
12
13
14
15
| @Configuration
@ConfigurationProperties(prefix="cn.fyupeng.config")
@PropertySource("classpath:resource.properties")
public class ResourceConfig {
private int serverPort;
public int getServerPort() {
return serverPort;
}
public void setServerPort(int serverPort) {
this.serverPort = serverPort;
}
}
|
3.2 编写启动器
1
2
3
4
5
6
7
8
9
10
11
12
13
14
15
16
17
18
19
20
21
22
23
24
25
26
27
28
29
30
31
32
33
34
35
36
37
38
39
| @Slf4j
@ServiceScan
@SpringBootApplication
@ComponentScan(basePackages = {"cn.fyupeng", "org.utils"})
public class RpcServerStarter implements CommandLineRunner {
@Autowired
private ResourceConfig resourceConfig;
@PostConstruct
public void init() {
Map<String, String> resourceLoaders = ResourceLoadUtils.load("resource.properties");
if (resourceLoaders != null) {
String serverPort = resourceLoaders.get("cn.fyupeng.config.serverPort");
resourceConfig.setServerPort(Integer.parseInt(serverPort));
}
}
public static void main(String[] args) {
SpringApplication.run(RpcServerStarter.class,args);
}
@Override
public void run(String... args) throws Exception {
while(true){
NettyServer nettyServer = null;
try {
nettyServer = new NettyServer("192.168.2.185", resourceConfig.getServerPort(), SerializerCode.KRYO.getCode());
} catch (RpcException e) {
e.printStackTrace();
}
log.info("Service bind in port with "+ resourceConfig.getServerPort() +" and start successfully!");
nettyServer.start();
log.error("RegisterAndLoginService is died,Service is restarting....");
}
}
}
|
3.3 编写配置文件
注意config/resource.properties与资源目录下的resource.properties不能同时公用,前者优先级高于后者
1
2
3
4
5
6
7
8
9
|
cn.fyupeng.config.serverPort=8082
cn.fyupeng.nacos.register-addr=192.168.2.185:8848
cn.fyupeng.nacos.cluster.use=true
cn.fyupeng.nacos.cluster.load-balancer=round
cn.fyupeng.nacos.cluster.nodes=192.168.2.185:8847|192.168.2.185:8848;192.168.2.185:8849
|
3.4 编写api
注意与客户端包名完全相同
1
2
3
4
5
6
7
8
9
10
11
12
| package cn.fyupeng.service;
public interface HelloService {
String sayHello(String name);
}
|
3.5 编写业务
注意Service注解为cn.fyupeng.service.HelloService
1
2
3
4
5
6
7
8
9
10
11
12
13
14
15
16
17
18
19
20
21
22
| package cn.fyupeng.service.impl;
import cn.fyupeng.anotion.Service;
import cn.fyupeng.service.HelloService;
@Service
public class HelloServiceImpl implements HelloService {
@Override
public String sayHello(String name) {
return "hello, my name is " + name;
}
}
|
为了使用配置文件注入来启动服务对应的端口

